
By Vlad Kuleshov, Founder & Lead Technician at Capahome LLC • Updated October 23, 2026
Chicago’s cold winters, rain, and freeze-thaw cycles can cause exterior caulk to crack or pull away from the door frame. These openings can allow chilly air and moisture to enter your home. Exterior door caulking helps seal gaps around the frame and trim, but some openings must remain clear so water can drain properly.
The Hidden Enemy: Air Leaks and Water Intrusion
Small openings around an exterior door frame can cause drafts and let heated indoor air escape. Damaged caulk can also let rain and melting snow seep behind the trim, potentially causing stains, swelling, or wood rot.
In older Chicago homes, joints between wood frames and brick can shift as temperatures change, causing sealant to crack or separate. However, not every gap should be sealed. Blocking drainage openings can trap moisture and lead to further damage.
How to Check Your Door for Gaps and Worn Sealant
On the interior side, look for signs of drafts around the frame, particularly during cold or windy weather. Examine the corners and fixed joints where different materials meet.
Check for cracked, loose, or missing sealant. If a joint is meant to be sealed, use an exterior-grade product that is compatible with the surrounding materials. Keep drainage openings clear so water can escape rather than become trapped behind the trim.
Where to Caulk an Exterior Door: The Sealing Zones
Exterior caulk belongs on fixed joints where gaps could let air or water behind the door frame. The right locations depend on the door and exterior finish.
Top and Side Joints Around the Door Frame
Inspect the joints above and along the sides of the door frame for cracked, loose, or missing sealant. Rain and melting snow can seep behind the trim or siding through damaged joints. Remove deteriorated sealant before resealing a joint that is designed to be sealed.
Use a flexible exterior sealant compatible with the surrounding materials, especially where wood or metal meets brick. Keep nearby drainage openings clear so water can escape rather than become trapped behind the exterior surface.
Gap Between Trim (Casing) and Door Frame
Sealant can be used to fill gaps where the door trim meets the door frame if the existing caulk has cracked or come loose. If there are deeper gaps, you may need to use a backer rod to control joint depth and support the proper shape of the sealant bead.
Apply caulk only along the joint rather than spreading it over the trim.
Gaps Around the Door Sweep or Threshold (The Exception)
Caulk may be suitable for fixed joints along the sides or exterior edge of the threshold, depending on the door design. Do not apply caulk to the moving door sweep or across the gap beneath the closed door.
Where Not to Caulk: Areas to Leave Unsealed
Not every gap around an exterior door should be sealed. Some openings allow water to drain, while moving parts need room to function. Caulking these areas can trap moisture or interfere with the door.
Bottom Threshold: Keep Drainage Paths Clear
Do not caulk across the bottom edge of the door or block drainage paths around the threshold. Trapped water can damage surrounding materials.
If cold air comes through beneath a closed door, check the door sweep or threshold adjustment rather than filling the gap with caulk. These components may need adjustment to reduce drafts.
Weep Holes in Brick or Siding: Keep Them Clear
Weep holes allow water to escape from behind brick or certain siding systems.
Never seal these openings with caulk.
Blocking them can trap moisture inside the wall.
If you are unsure whether a gap is a defect or a drainage opening, identify its purpose before applying sealant.
Hinges and Moving Parts: Never Seal
Keep caulk away from hinges, moving door hardware, and joints that need to flex as the door opens and closes. Sealant in these areas can interfere with movement and crack over time.
How to Prepare the Surface for Caulking
Proper preparation helps exterior caulk adhere to the surface and form a durable seal. Before starting, make sure the joint is suitable for sealing.
Removing Old Caulk and Debris
Remove old, loose, or damaged sealant with a putty knife or caulk removal tool. Scrape carefully to avoid damaging painted trim or other surfaces.
Clear away dust, loose paint, and debris. Check for moisture or damaged wood before applying new sealant. If you find rot or signs of serious water damage, address the underlying problem first.
Using Backer Rod for Deep Gaps
A backer rod is a flexible foam material placed inside deep joints before applying sealant. It helps control joint depth and supports the proper shape of the sealant bead.
Use a suitable size that fits snugly below the surface. Backer rod is generally unnecessary for small, shallow gaps. For oversized gaps or visible damage to the surrounding frame, seek a professional assessment before starting a DIY repair.
Cleaning and Drying the Area
Clean the joint according to the sealant manufacturer’s instructions, removing dust, grease, and other contaminants. Let the surface dry completely after rain, washing, or snow, as moisture can affect adhesion and curing.
Before caulking, confirm that the joint is clean, dry, and stable. If water is coming from behind the trim, find and address the source rather than covering the problem with new caulk.
The Right Way to Apply Caulk
Once the joint is clean and dry, apply exterior caulk in a steady, even bead. Work along the joint without unnecessary stops.
Tools You’ll Need
For exterior door caulking, prepare:
- exterior-rated sealant;
- caulk gun;
- utility knife or nozzle cutter;
- putty knife or sealant removal tool;
- clean rag and gloves;
- backer rod for deep joints, if needed.
Make sure all materials are suitable for exterior use and the door surfaces are clean and dry before you begin.
Cutting the Nozzle and Loading the Caulk Gun
Cut the nozzle at a slight angle, starting with a small opening. Load the tube into the caulk gun and make sure it is secure.
Apply steady pressure while moving along the joint at a consistent speed. A controlled bead is easier to smooth than one that is too thick.
Smoothing the Bead and Finishing the Joint
Smooth the caulk while it is still workable, following the manufacturer’s instructions. Press it into the joint and wipe away excess sealant before it starts to cure.
Check that the bead covers the intended gap without blocking weep holes or drainage paths or interfering with hinges and other moving parts. Allow the sealant to cure for the time specified on the product label before exposing it to water or painting it, if applicable.
How to Maintain Exterior Door Caulk
Chicago’s freeze-thaw cycles and changing weather can put stress on exterior caulk. Inspect the joints at least once a year, preferably before winter. Look for cracks, peeling, shrinking, or areas where the sealant has separated from the surrounding surface.
If you notice damage, remove the deteriorated caulk and prepare the joint before applying new sealant. Use a UV- and weather-resistant exterior sealant suitable for the surfaces involved, and follow the manufacturer’s instructions for application and curing.
When Professional Caulking Makes Sense
If gaps keep returning, moisture is present behind the trim, or you’re unsure which joints are designed for drainage, professional inspection may help identify what actually needs sealing.
Door Caulking Services in Chicago
Capahome provides exterior door caulking in Chicago and nearby suburbs. Depending on the condition of the entry, the work may include removing deteriorated sealant, preparing the joint, applying an appropriate exterior sealant, and checking that drainage openings remain clear.
Send photos of the affected area to discuss the repair and get pricing before scheduling the work. Capahome does not charge a diagnostic or trip fee. Learn more about ourprofessional door caulking service.
Need Help With Your Exterior Door?
Serving Chicago and 20 northern suburbs with fast, professional door sealing and repair services. Call Capahome LLC at (224) 434-0915 or request an estimate online.
Frequently Asked Questions
Should I caulk between the door frame and the brick?
Generally, yes, if those joints are intended to be sealed. Keep drainage openings clear at the bottom. Use an exterior sealant compatible with both materials and able to accommodate movement.
Can I apply new sealant over old, cracked caulk?
No. Remove any loose or deteriorated sealant first so the new application can bond properly. Use a putty knife or a sealant removal tool, taking care not to damage the surrounding surface.
Is it okay to caulk the bottom of my exterior door?
Do not fill the operating gap beneath the door or block drainage openings around the threshold. Some fixed joints along the threshold perimeter may require sealant, depending on the door system and installation. If cold air is coming from beneath the closed door, check the door sweep and threshold adjustment instead of filling the gap with caulk.
What type of caulk is best for exterior doors in Chicago?
Choose a UV- and weather-resistant exterior sealant that can handle temperature changes and is compatible with the surfaces involved. Check the manufacturer's instructions before applying it to wood, metal, brick, or siding.
How often should I inspect exterior door caulk?
Inspect the joints at least once a year, preferably before winter. Look for cracks, peeling, shrinking, or separation from the surrounding surface. Remove damaged caulk and reseal the joint as needed.
Related Articles
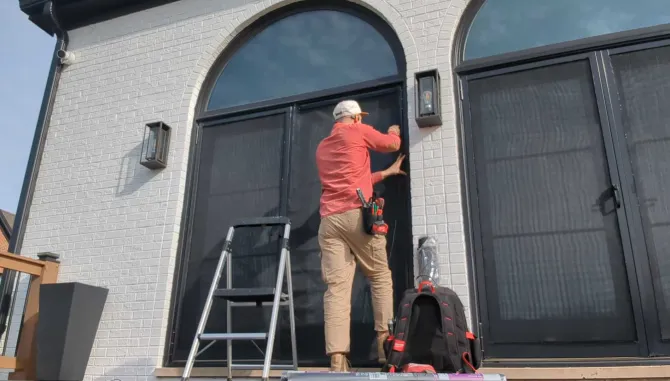

Founder & Lead Technician at Capahome LLC with 5+ years of hands-on experience in window, door, blind, and screen repair across Chicago and suburbs.
Meet the Technical Team →Schedule a Free Estimate
Get a free, no-obligation estimate from a Capahome window and door repair specialist.